

How to Restring a Wind Chime: A Practical Repair Guide
Care & repair · Updated September 25, 2026 · Perfect Pitch Chimes
To restring a wind chime, record its original layout, choose the right replacement cord, and rebuild one cord route at a time. Restore the tube positions and striker height before testing the sound. Take the photos and measurements before cutting anything.
Own a Lambright chime? Start here.
The Lambright lifetime warranty covers flawed or dysfunctional parts, including string, for as long as you own the chime. Chimes must be returned to receive free repairs; normal paint wear is excluded.
Before dismantling it, contact lambrightchimes@ibyfax.com for repair instructions and return arrangements. The policy does not say return shipping is free. If you need help identifying your chime, contact Perfect Pitch Chimes with photos.

Before you begin
Is this a suitable home repair?
This guide is for tubular chimes whose cord routes and attachment points are accessible and understood. Makers use different suspension systems: visible holes, concealed supports and continuous lacing are not interchangeable. Follow your model's instructions when they differ from this general guide.
A reasonable DIY starting point
- You can see and photograph the full original cord route.
- The top, tubes, striker and hanging hardware are intact.
- You have the correct replacement cord and fastening instructions.
- You can support and handle the chime safely at a worktable.
Ask the maker first
- The original routing is missing or hidden inside the tubes.
- A top plate is cracked, hardware is corroded, or a hole has a sharp worn edge.
- The chime is too heavy to handle comfortably.
- You do not know the cord specification or approved attachment method.
For another brand, look for its own repair instructions. Woodstock Chimes publishes model-specific downloads, while Windsong provides a guide for its own chimes. Their layouts should not be assumed to match a Lambright chime.
Identify the broken line
Three cords can do three different jobs
- 1. Upper suspension
- Connects the hanging ring or hook to the top. Its balanced lengths keep the top level.
- 2. Tube suspension
- Supports the sounding tubes from the top. It may be separate pieces or one continuous cord threaded through several points.
- 3. Center line
- Supports the striker (also called the clapper) and the windsail below it. The striker contacts the tubes; the sail catches the breeze.
Replacing a broken sail line is different from rebuilding the load-bearing upper suspension. Identify which system failed before ordering cord or taking the chime apart.
Gather your supplies
What string should you use for wind chimes?
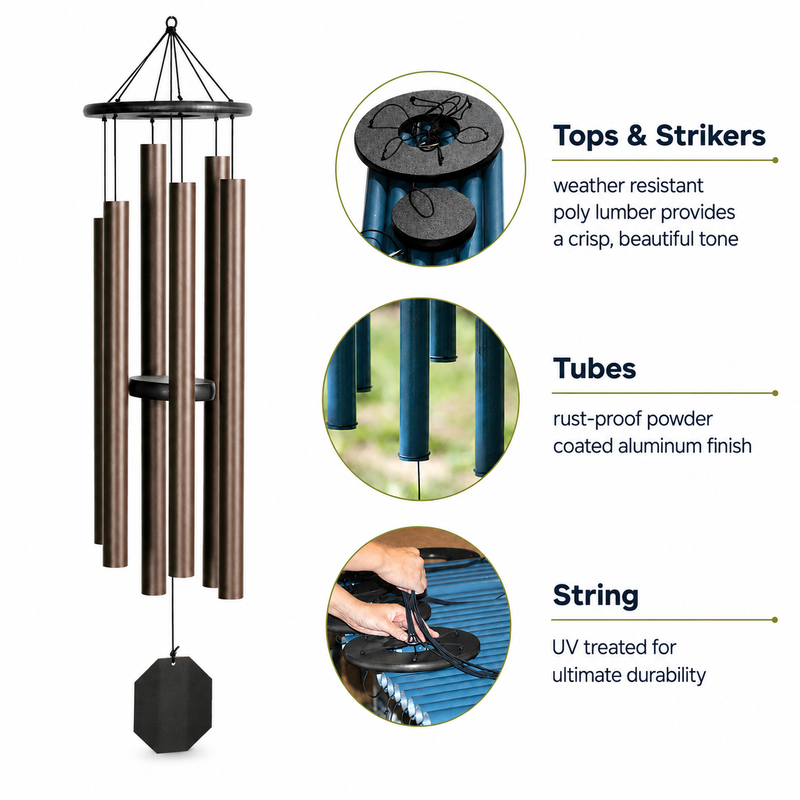
Use the cord specified by the chime's maker, matching its material, diameter, strength and suitability for outdoor exposure. Lambright chimes use UV-treated polyester cord, according to our product FAQ. That does not establish one replacement diameter for every model.
Thicker is not automatically better: a cord that barely fits can be damaged while threading, and a different cord can change the way a knot holds. Do not substitute household cotton string, wire or fishing line simply because it passes through the hole. Ask the maker for the replacement specification if it is unknown.
On the worktable
- A folded towel to protect the finish and catch parts
- A phone camera, notebook and pencil
- A tape measure or ruler
- Suitable replacement cord and sharp scissors
- A blunt threading aid, if the cord route needs one
- Small loose tags to identify tube positions
Keep the old layout intact
Photograph the top from above and below, each tube connection, and the knots. Include a ruler in close-ups where useful.
Label positions around the top as A, B, C and so on. Keep the original order instead of arranging tubes by length unless the maker specifies that pattern.
The step that saves the most guesswork
Record cord routes before cutting
There is no reliable universal answer to “how much string do I need?” One chime may use a continuous lacing pattern; another may have individual tube loops. Measure each complete route, including its returns through the top, rather than measuring only the visible drop.
Record the finished hanging positions too. Old cord may have stretched, and a frayed end may be missing. If the remaining pieces cannot establish the original layout, get a model diagram before proceeding. Leave extra working length for tying and adjustment; trim only after the assembly is secure and checked.
| Cord or position | Route & anchor points | Original finished position | Cord length / notes |
|---|---|---|---|
| Upper suspension | Ring → top attachments | Top level; record each leg | ________________ |
| Tube A | Sketch entry, support & return | Top to tube's upper end | ________________ |
| Tubes B, C… | One row per route; note shared cord | Record separately | ________________ |
| Striker | Center attachment → striker | Original contact height | ________________ |
| Windsail | Striker/center line → sail | Clearance below tubes | ________________ |
A careful, repeatable sequence
How to restring a wind chime in 7 steps
Take the chime down and support every part
Use help for a large or heavy chime. Place it on the towel without stacking the tubes against one another. Check the hanging ring, top, tube supports and center line. If a structural part is cracked or an edge is cutting the cord, resolve that damage before restringing.
Map the route and preserve a reference
Complete the photos and worksheet above. Keep an intact neighboring connection in place as a reference where possible. If a single cord supports several tubes, sketch its entire path and label the tubes before removing any of it.
Remove only the cord you are replacing
Support the tube or assembly with your hand, then untie or cut the worn cord. Save it beside its labeled parts. Do not cut all the cords at once: you would lose both the layout and the remaining support.
Wipe accessible surfaces with a soft cloth. Stop if you discover a damaged support or sharp edge; forcing new cord across it can cause the same failure again.
Thread the replacement along the original path
For a model with accessible through-holes, feed the new cord through the same entry and exit points in the same direction as the old one. Work gently, supporting each tube as you go. A blunt threader or a small removable tape wrap on the cord tip may help; do not enlarge holes or force a thick end through.
If the tube hangs from an internal support bar, do not replace that arrangement with a loop around the outside. Use the maker's procedure. A cord wrapped against a sounding surface can interfere with vibration.
Recreate the correct attachment and finished lengths
Use the knot or fastening method specified for that attachment and cord. A stopper knot prevents an end passing through a hole; it does not serve the same purpose as a loop around a support. “Double-knot everything” is not a reliable instruction for every design.
If your instructions call for a double-overhand stopper, it is made by taking the working end through the same loop twice before drawing the turns neatly together. See Animated Knots' step-by-step demonstration. This explains the knot, not its suitability for your chime; verify that with the maker.
Set the knot firmly, retain the required tail, and match the recorded finished drop. Keep supporting the assembly while checking each attachment. Do not use an open flame or glue as a substitute for the correct knot.
Restore the striker and windsail positions
Reinstall the center line along its original route. Match the striker's original contact height rather than assuming it belongs at the midpoint of every tube. Leave the sail below the tubes with the original clearance, free to move without tangling.
Check that the top sits level and that neighboring tubes do not rest against one another. A misplaced striker or crossed cord can make a correctly threaded chime sound dull.
Check the assembly before hanging it outdoors
With the chime supported close to the padded work surface, gradually let its weight settle onto the repaired suspension. Watch for knots moving, cord slipping or the top tilting. Do not hang it overhead if anything shifts.
Gently move the sail and let the striker contact the tubes. They should ring freely after the strike. Recheck the routing if they do not. Trim excess cord only after everything is set, following the cord supplier's finishing instructions and keeping the specified knot tails.
Rehang using hardware and a supporting structure suitable for the chime's actual weight. Check the repair again after its first period outdoors and periodically afterward. Our wind chime placement guide helps you choose a spot with clearance and gentle airflow.
Listen, then look
Why does my chime sound different after restringing?
Allow a strike, then a release
The striker moves into a tube, then away so the tube can vibrate. Restore the original spacing and contact height.
Constant contact can damp the note
Look for a trapped striker, crossed line or tube resting against another part. These diagrams show the principle, not a model's dimensions.
| What you notice | What to check | Next action |
|---|---|---|
| Dull or short ring | Cord touching a sounding surface; tubes or striker held in contact | Restore original routing and clearance. Do not alter the tubes. |
| Top hangs crooked | Unequal suspension legs, a slipped knot or an incorrect tube position | Support the chime, compare your photos and reset the affected attachment. |
| Sail moves, but few notes sound | Striker height, tangled center line or insufficient airflow | Match the original geometry before trying a different hanging spot. |
| New cord frays quickly | Damaged hole, sharp support or wrong cord specification | Take the chime down and ask the maker to inspect the contact point. |
| Knot or cord keeps slipping | Incompatible fastening, insufficient tail or wrong cord | Keep the chime down until the attachment is corrected. |
Wind chime restringing questions
Can I restring a chime when all the cord has broken?
Sometimes, but you need a reliable route and finished measurements. Keep every part, photograph the top and tube supports, and identify the brand and model. Request a diagram or repair service rather than inventing a pattern from tube length alone.
Does replacing the string change the pitch?
Restringing does not deliberately retune a metal tube. Its dimensions and material are unchanged. A changed support, contact point or striker position can alter how clearly it rings, so compare the assembly with the original before deciding the tube itself is at fault.
Can I follow these steps for bamboo, glass or shell chimes?
Use the documentation and measurement principles, but get instructions suited to those materials. Their holes, supports, fragility and intended contact differ from tubular metal chimes. Do not force a threader through a delicate or split part.
Can I buy a replacement windsail instead of restringing everything?
If only the sail is missing or damaged, a complete rebuild may be unnecessary. Ask us to help match a replacement to your model; the sail's size and attachment affect how the chime moves. Keep the original center-line arrangement unless the maker instructs otherwise.
How can I make the new cord last longer?
Use the specified outdoor cord, check wear at contact points and knots, and bring the chime indoors during severe winds, ice storms or other extreme weather. Outdoor materials still need inspection; no cord should be treated as maintenance-free forever.
Keep a good chime singing.
Save your photos and measurements with the model name. They make future maintenance—and a conversation with the maker—much easier.
Get help identifying your chimeConsidering a different sound? Listen to our chimes or explore large and deep-tone models.
Editorial note: general repair guidance compiled by Perfect Pitch Chimes, a retailer of Lambright Country Chimes. Model-specific cord diameters, routing and knot specifications must come from the maker. Product and warranty details checked September 25, 2026.